
How To: Make Nut Butter
About This Recipe
Expensive almond and peanut butters are a weekly staple for many health-conscious shoppers but did you know how easy it is to make your own?
Contrary to popular belief, you don’t need a commercial nut butter machine to grind your own - all you need is a high strength food processor or blender and a little bit of patience.
Homemade nut butters are a staple in my household for topping smoothie bowls, adding to creamy sauces, spreading on toast and of course eating straight from the jar.
I usually make a batch of nut butter on weekends to use throughout the week and I vary the nuts and seeds that I use as the base.
Feel free to experiment with your own combinations of nuts and seeds in your butters as well as raw versus roasted nuts.
I generally find that most nut butters taste best when the nuts have been roasted, however to save time you may want to try some raw combinations.
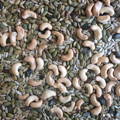
One of my all time favourite combinations is cashew-pepita-sunflower seed butter.
This perfect mix is heavenly as a savoury or sweet spread and is a nice change to regular almond or peanut butter.
For this nut butter I always roast the nuts first and then allow them to cool a little as I find this really enhances the flavour.
When you are blending your nuts, you will inevitably have a period of “This is never going to turn into nut butter?!
It just looks like ground nuts?!” but bare with me, within a matter of seconds the oils will suddenly be released, and just like that, your blender will be full of rich, creamy nut butter.
All you need is a little faith that those nuts will eventually do their thing.
How To Make Nut Butter
You Will Need:
- 3 cups nuts or seeds (make your own combinations or simply use one nut or seed - I used 1 cup each of cashew, pepita and sunflower seeds)
- Pinch salt
To make:
- Preheat oven to 180 degrees C
- Roast nuts/seeds for around 10 minutes until just golden and fragrant
- Allow to cool slightly before adding to the food processor or blender
- Begin blending the nuts/seeds with the pinch of salt - you will need to leave the motor on for anywhere between 5 - 10 minutes depending on the power of your machine. If the machine starts to get too hot, turn it off for a minute or two to make sure you don’t over-use the motor.
- Keep a close eye on the nut butter as it forms, you may need to periodically turn off the machine and scrape down the sides.
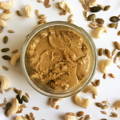
- Be patient! For the first 5 minutes at least, you will see a very fine grain of nut meal spinning around your machine. Once they have been processing for some time, the oils will magically be released and all of a sudden your dry mixture will thin out and become smooth and oily. Once this happens you may want to leave the motor running for one more minute to ensure maximum smoothness.
- Scrape out your nut butter into an airtight jar or container. It should last this way in the cupboard for a couple of weeks (if you can resist it that long!).
Enjoy the satisfaction of homemade nut butter and get creative with different combinations of nuts and seeds. Let me know in the comments below if you discover any winning combinations!


About The Author - Tamika Woods